Howdy folks…. Well I had a bit of a weekend project that I completed today. Our bathtub had some old discolored and moldy caulking around the top where the tile meets the tub. Evidently who ever tried to repair it the first time just applied some clear silicone sealer on top of the damaged caulk and it looked horrible.
What happens when you do a repair like that, is the mold that is underneath the rubber silicone will continue to grow mold and eventually it will turn the silicone a brownish black color. And believe me, it looked horrible. So I took on the do it yourself project of fixing it, and it turned out pretty good if I do say so myself.
But lucky for you, I was thinking about my readers when I tackled this project. So I thought I would document the step I took during the repair and share it with you in case you ever need some help doing something like this.
 Remove the Old Caulk and Mold
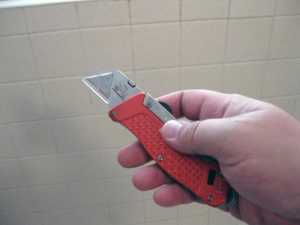
So in the first step is to remove all the old caulk and sanitize the area so the mold will be killed. This way it will not continue to grow once you’ve repaired the joint where the tile meets the bathtub. So as you can see from the image, I used a simple utility knife and used it to cut along the top of the tub and the bottom of the tile in order to loosen the bond of the existing caulk and silicone. Once it was good and loose, I went along the edges using a putty knife to scrape the old stuff out of the crevices. It wasn’t as easy as it sounds, but with a little elbow grease, it all came out fairly easy. The total time it took to remove the old 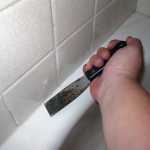 caulk and silicone was probably about an hour.
I used an old measuring pitcher to collect all the trash I collected as I went. This makes your clean up way easier in the end. You will actually be surprised at how much dirty gunk you will retrieve. If your bathtub is very old it can collect a lot of mildew and grime over the years. That stuff is terrible on your allergies and health. But once you’ve remedied the situation, it is easy to keep it under control from 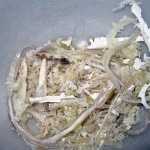 that point on. Take a look at all the goodies I collected out of this tub.
Killing the Mildew and Germs
After you’ve gotten all the old caulk, germs and mildew out of the grout line then comes the next step. This step is crucial to preserving the cleanliness of the new seal you’re going to put on your tub. You need to get some concentrated bleach cleaner, or you can use diluted bleach. Thoroughly spray the 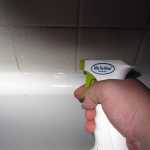 infected areas with the bleach solution and let it sit for at least an hour so it can eat away at all the mold and mildew. This will sanitize the area as well as kill all the germs that may be hiding in there. It is some good safety advice to wear a protective mask when working with the bleach. It’s not safe to breathe in the fumes. Even an simple painters mask will work. If you do not have one, they are super cheap at the hardware store, or at least get a cloth and hold over your mouth and nose while spraying.
Scrub the Area Thoroughly
After you’ve let the bleach solution sit in the cracks and crevices for at least an hour, then it’s a good idea to take a scrub brush and thoroughly scrub the area until it is well cleaned. This will also help remove any extra loose caulking that may still be on the surface area. If you have a wire brush this will work good 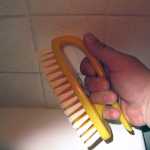 too. But be careful, you don’t want to scratch the surface of your tub. Especially if it’s a porcelain finish.
Once you’ve finished scrubbing the tub real good, then you can get a cup or possibly a measuring pitcher like I used and fill it with water and use it to rinse out the cleaned area really well. Make sure all areas are clean and no signs of mildew or mold are present. If you still see signs of mold or mildew, then repeat the process of bleaching the area. When you are certain the area is good and clean, then jump back down to this part of the post to continue on.
Dry the Surface Real Good
After you’re finished cleaning and rinsing, then dry the area really well with a dry cloth. Next get a clean, dry cloth and some rubbing alcohol. Yep that right, rubbing alcohol. Moisten the cloth with the rubbing alcohol generously and rub it over the surface of the 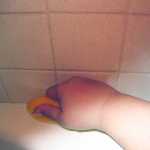 area you’re repairing. This will help to evaporate any left over moisture that may be hiding in the cracks and crevices. Once you’re sure it good and dry, then let it sit for about 30 minutes before going on to this next step.
Filling in the Cracks
Now that our tub is nice and dry. Everything is clean and the old caulking is out of the way, it’s time to fill in some cracks. If you have any areas that have deep crevices you may want to get a small tube of caulk to run along those edges to make sure everything is sealed well. I do not recommend a rubber silicone for this type of project. Be sure to get the white caulk, your hardware specialist can direct you to the right stuff. After applying a small bead along the seams of the crevices, then take you finger and run it along the edges to push it into the cracks and make a smoother, cleaner looking caulk line. Most caulk will recommend letting it sit for 72 hours after the application so that it may fully cure.
Applying the Caulk Strip
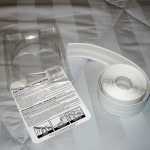
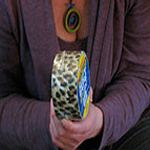
Ok, once our caulk is dry, it’s time to apply the caulk strip. You can purchase this at any hardware store and it comes in a small role like pictured on the left. This stuff isn’t actually caulk, but it’s a plastic water barrier that has a sticky backing on it that will adhere to the tile and tub. This stuff is really good and it seals out any moisture and will prevent mold and mildew from forming in your tub again.
This stuff is really easy to apply and only takes a few minutes. First you want to measure out three strips. Measure the length of your tub and cut one strip to go along the length of the back side of the tub. Then measure the width of the tub and cut two more strips, one for each end of the tub. Now it’s time to apply it.
The backing on this has two adhesive strips running down the length of it, and a folding 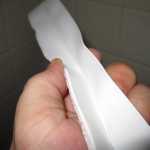 crease in between them. So take your long piece and fold it in half, making sure the adhesive is on the outside once folded. It’s probably a good idea at this time to put the strip up against the area you want to apply it and just make sure the fit is correct. That way if you cut it too long or it doesn’t fit properly, this will give you a chance to correct the situation before it’s stuck down.
Then peel the backing off of the strip down to about twelve inches or so, just enough to 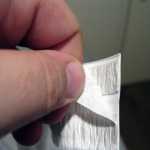 give you room to begin application. Starting in the corner, place the caulk strip in the proper position and then wedge it into the crease where the tub and tile meet, forming a 90 degree angle.
You do not have to press firmly, just gently push it down toward the tub first, and then the part that meets the wall. It’s important not to stretch, pull or rub your hand along the strip while applying. Just lightly press it into place. Continue doing this along all three side of the tub until installation is complete. Then go back around the caulk strip and firmly press the 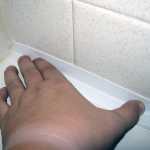 strip down using your fingers to ensure a good seal. It’s best not to use your tub for at least 12 hours after installation.
Finishing Up After the Job
Now we’ve completely finished our project and the tub looks great! No more mold or mildew and a nice clean looking barrier to keep out moister so it will not come back.
Of course all jobs have a clean up after their over. So be sure to dispose of the old mold and mildew infested caulking that you removed. It’s good to not throw it in your household 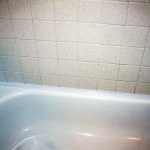 trash. If you have a trash can or dumpster outside of the house, please use them instead. Mold spores and mildew can become airborne and it’s not good to be breathing in that stuff. Then of course return any tools you used during the job back to their rightful place. You don’t want anyone to accidentally cut themselves on a utility knife or something.
So there you have it, simple and easy and it can save you a ton of money by not having to call out the professionals. By the next morning you should be using you nice squeaky clean tub without having to look at that terrible mildew ever again. Hope this post is helpful to some of my readers. May all your home projects be successful!

A nice thing that you know how to repair any bathroom or bathtub problems.
These types of skills definitely do come in handy, it’s a lot easier on the pocket book too! 🙂 Thanks for stopping by
Nice guide, this will make it easy for anyone to follow and get the job done correctly…
Thank you Carl, I’m glad you’ve found this guide helpful. These types of projects are really easy to complete yourself with a little knowledge and the right tools.
Thanks for stopping by…
You make this look so easy! I tried to recaulk my tub and made a huge mess. The caulk strip seems to be so much more convenient and less messy than the stuff I got. I did want to thank you for pointing out the need to get rid of mildew when the old caulk is removed. It’s like painting moldy walls; the mold is still there and you’ve given it a dark damp place to grow. Using the bleach solution will definitely make sure any spores left are gone.
Hi Jamie and thank you for the feedback.
With any household project there’s normally a bit of elbow grease involved and this project was no exception. As you mentioned ridding the surface areas of any mold spores and mildew left behind after removing the old caulk is of utmost importance. Mold is like a plague and will spread and grow rapidly, that stuff is very nasty and can make you and your family very sick.
The caulk strip does make this project quite easy, but if you intend to use it, be sure the surface area is completely dry before applying the strip or it may break loose from the tub and tile and that means buying a whole new package of caulk strip and redoing the job.
Wishing you the best in your home improvement projects!
Best Regards,
Robert
Thank you for the advice! I also meant to ask if you have a certain brand of caulk strip you suggest to use, given that I’m sure not all are made equally.
Yes Jamie, I believe I used HOMAX brand for this project and it worked out well. Should be able to find it at any Home Improvement Center. If I remember correctly, I purchased this at Lowe’s for around $5 USD
One of the hardest things to do is pull out mold, mildew and gunk from in between the tiles in the bathroom. It has gotten to the point that some of my tiles are loose and starting to fall off the wall. How do I re-adhere them?
Well Bryan, normally you can re-adhere your missing tiles with some grout. Although it is usually hard to match the color of the grout with the ones that are still on the wall, you can get a darker grout and some white and mix until you get a close match, just keep in mind it will usually lighten up as it dries. They make some acid cleaners that you may need to use after the application to bring out the true color of the grout.
Thank you so much for the informative post. Am facing this problem in my washroom, am glad to found your blog today 🙂
You’re very welcome. Best of luck to you in ridding yourself of the mold and mildew!
It seems so easy! Thanks for sharing! 🙂
Hi May! You’re very welcome and I hope your project goes seamlessly. 🙂
Great tips bud.!!! Removing mold is like a nightmare for me. But the tips that you have mentioned in this post were really useful for me.
Worth reading post.
For cleaning the mold in the grouts, I often use vinegar and lemon juice. Sure, it needs some manual labor when the mold is sticky, but works most of the time.